
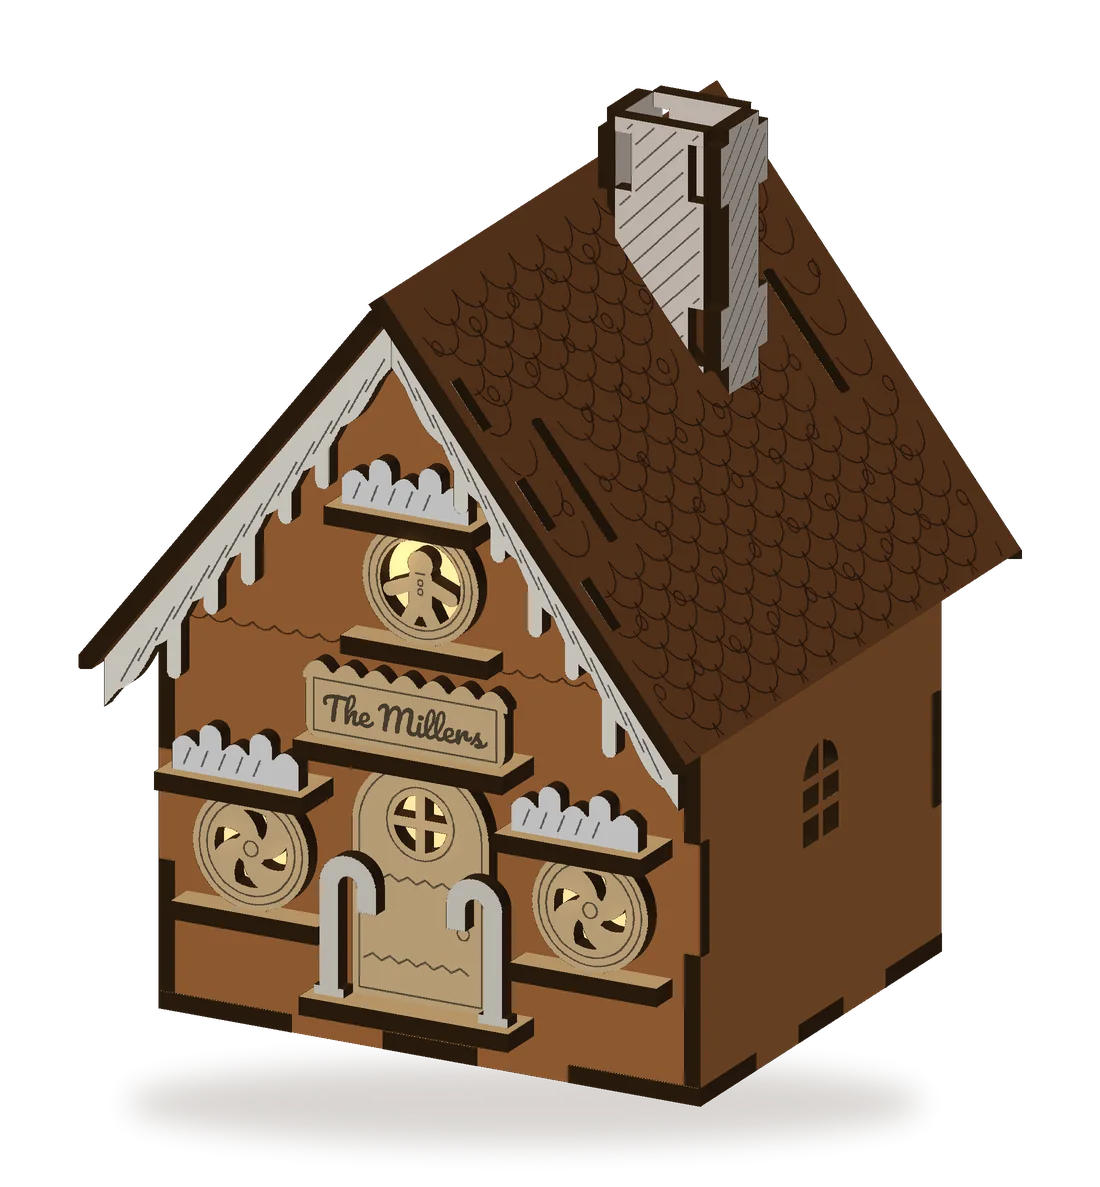
Gingerbread House
- 11 STEPS
- 31 WOOD PIECES
- NO GLUE
- ABOUT 5.3 IN TALL
Before you start
- Lay your pieces out engraved side up. Each step shows the pieces it uses, drawn the way they lie on the table.
- No glue and no tools. The tabs are snug on purpose: press evenly and work each joint in a little at a time. Never force one corner.
- Engraved sides always face out. Left and right always mean as you look at the front of the house, the side with the door.
- The vellum is the thin paper that makes the windows glow. Each piece is the shape of its window or door frame, just a little smaller, so they are easy to match. If your vellum is still on its little card, press each piece out gently when its window goes on.
- Painting? Paint the pieces before you build. Keep the paint thin on the tabs and out of the slots, or the joints get too tight.
How a window goes on
Dress the walls flat on the table before they go up. Every layered window and door goes on in the same order, from the bottom up. Here is one window, piece by piece, with the new piece in gold.
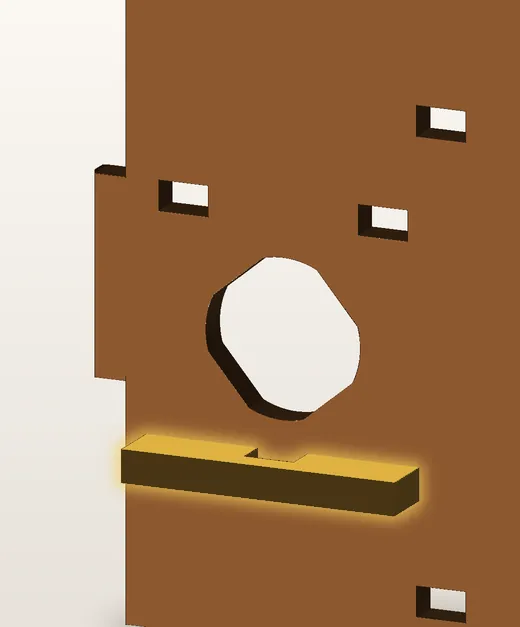 1. SillPush the sill's two end tabs into the pair of slots under the window.
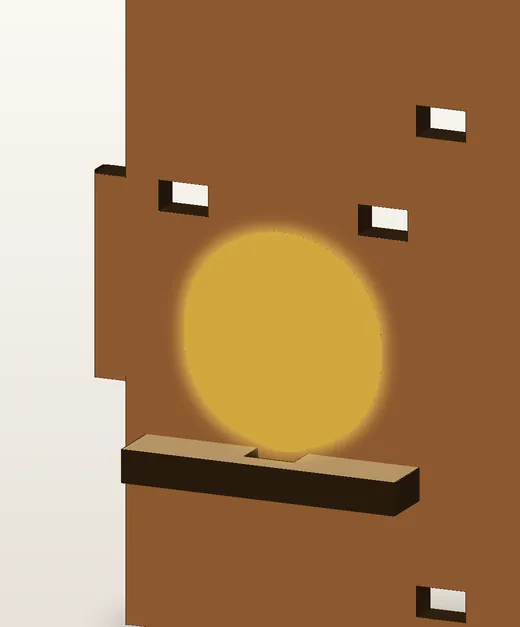 2. VellumLay the vellum on the wall, its bottom edge against the sill.
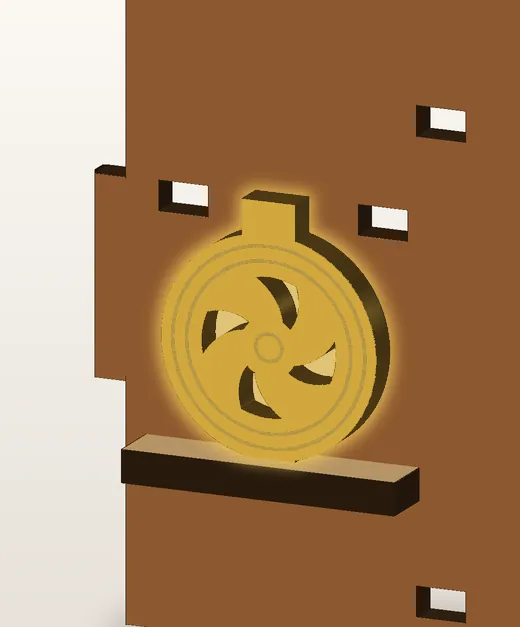 3. FrameSet the frame over it so its bottom tabs drop into the sill's notches.
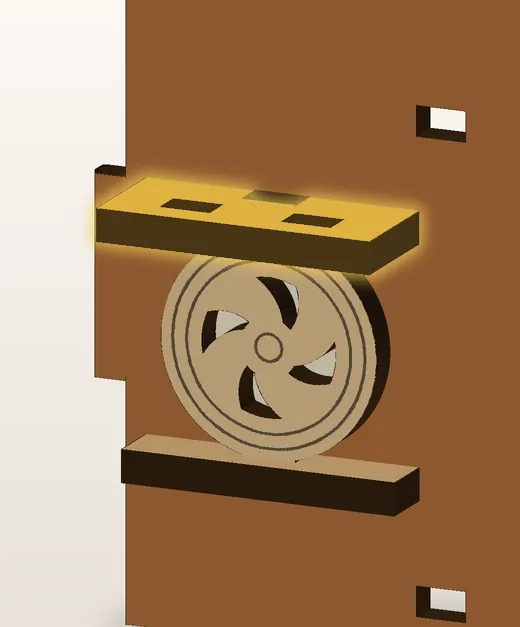 4. HoodPress the hood on over the frame's top tabs, its own tabs into the slots above.
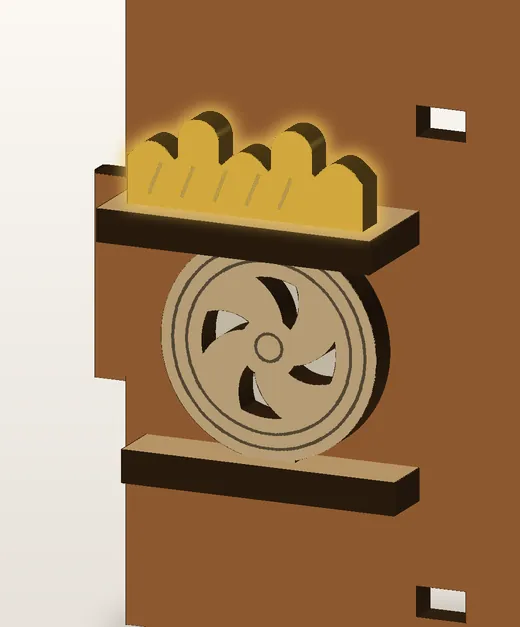 5. Frosting capStand the frosting cap in the hood's two front slots.
Step 1: The front door
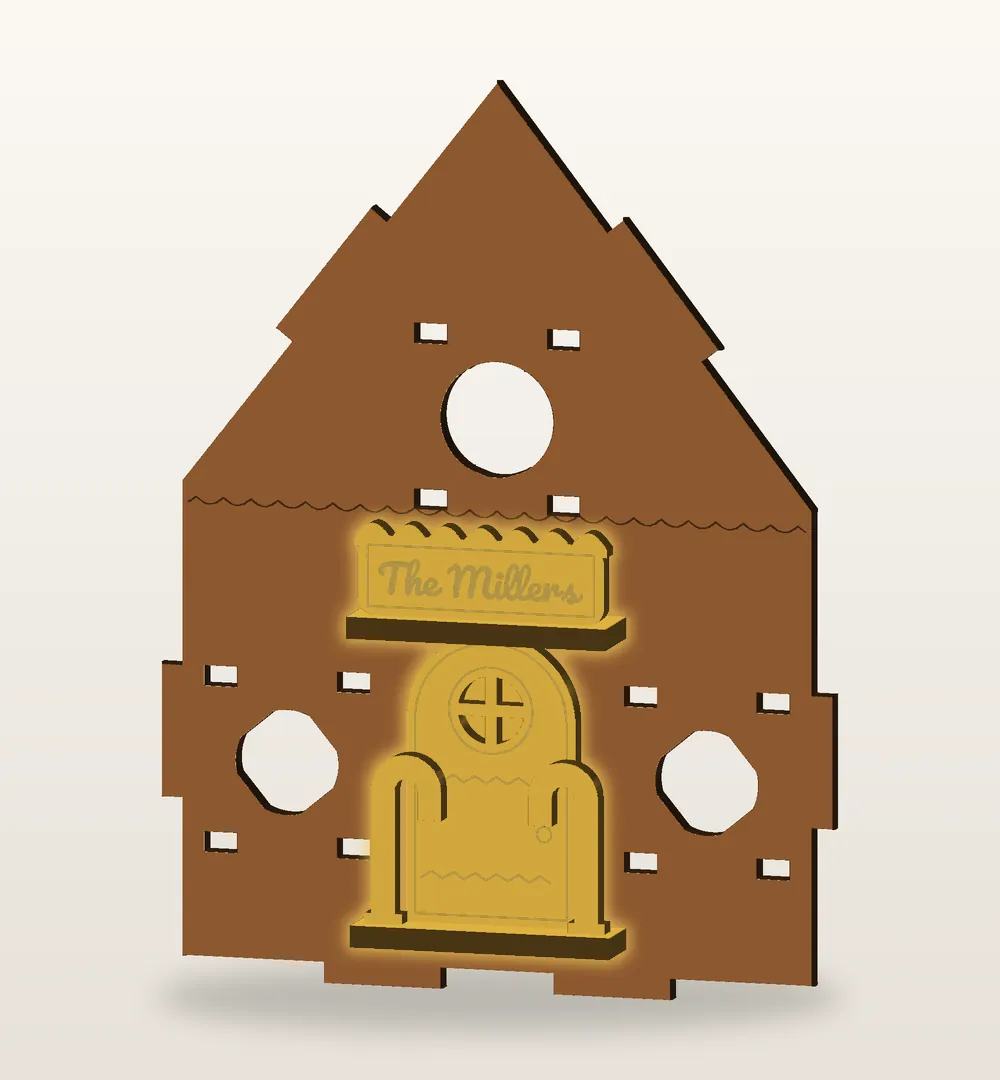
Lay the front wall flat on the table, engraved side up. Push the door step's two end tabs into their pair of slots near the bottom of the wall and stand the two candy canes in the step's front slots. Lay the door's vellum on the wall with its bottom edge against the step, then set the door over it so its bottom tabs drop into the step's notches. Press the hood on over the door's top tabs, its own tabs into the slots above, and stand your name plaque in the hood's two front slots.
Pieces for this stepDOOR STEP CANDY CANE CANDY CANE HOOD NAME PLAQUE Step 2: The windows
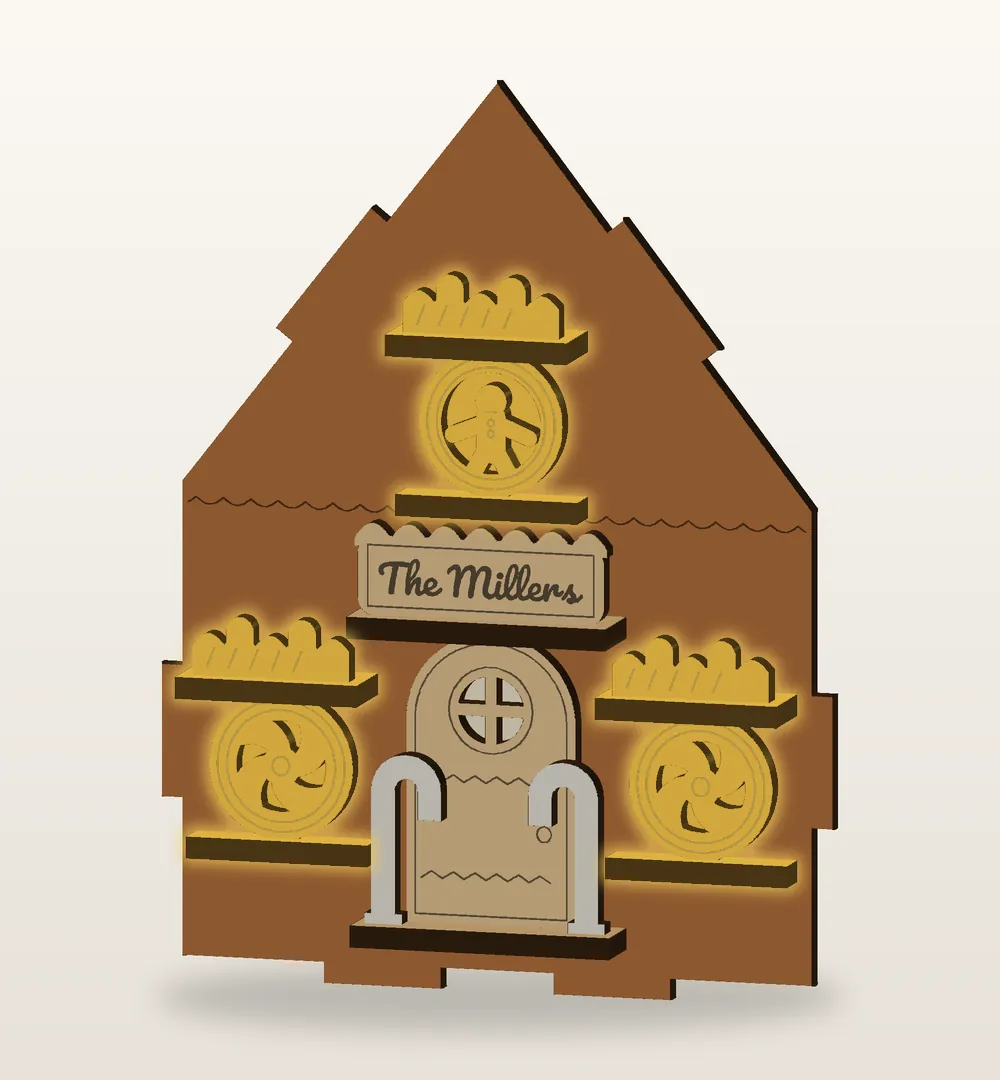
The two peppermint windows and the gingerbread man window up in the gable go on next: sill, vellum, frame, hood, then the frosting cap in the hood's front slots. Each window goes on the same way, as shown above.
Pieces for this stepWINDOW × 2 SILL × 3 HOOD × 3 FROSTING CAP × 2 WINDOW FROSTING CAP Step 3: Floor and front wall
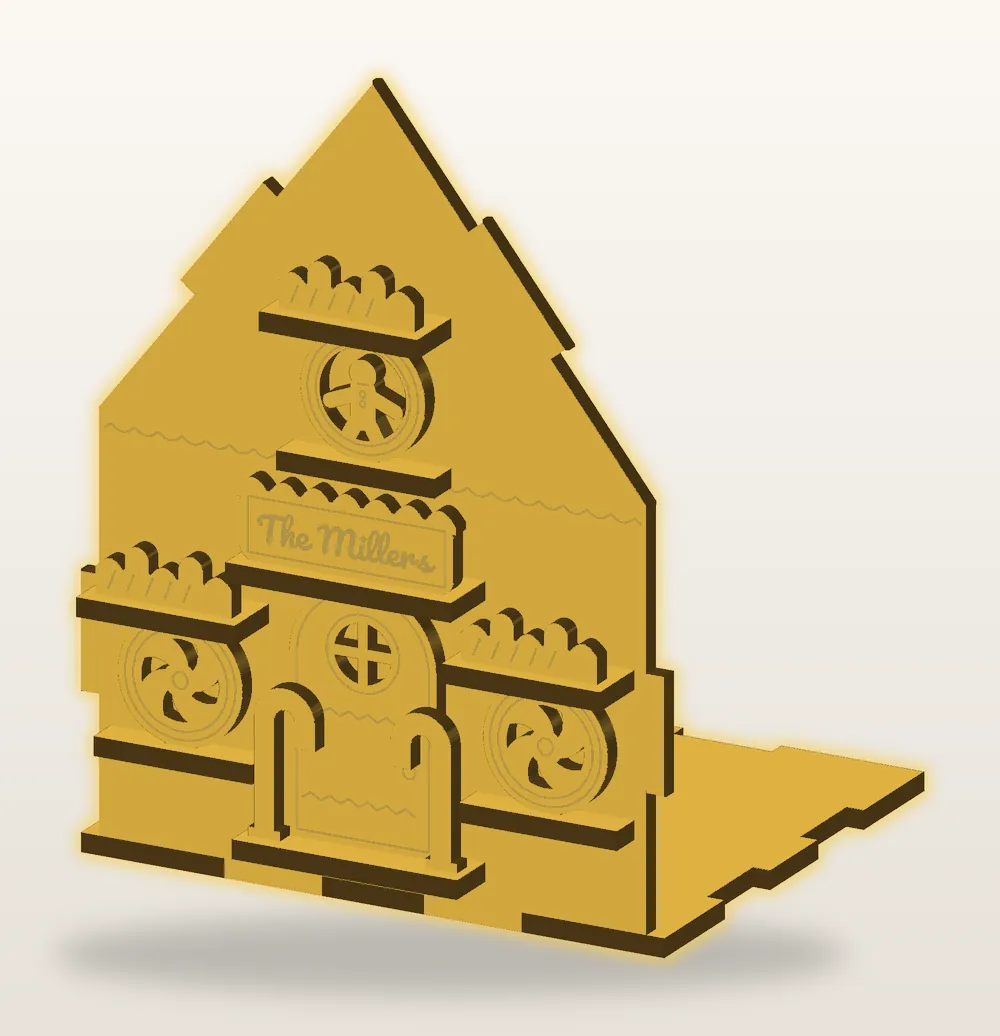
Lay the floor flat, tealight opening in the middle. Stand the front wall on the floor's front edge, door facing out, and slide it in so its bottom tabs drop into the floor's notches.
Pieces for this stepFLOOR FRONT WALL Step 4: Right side wall
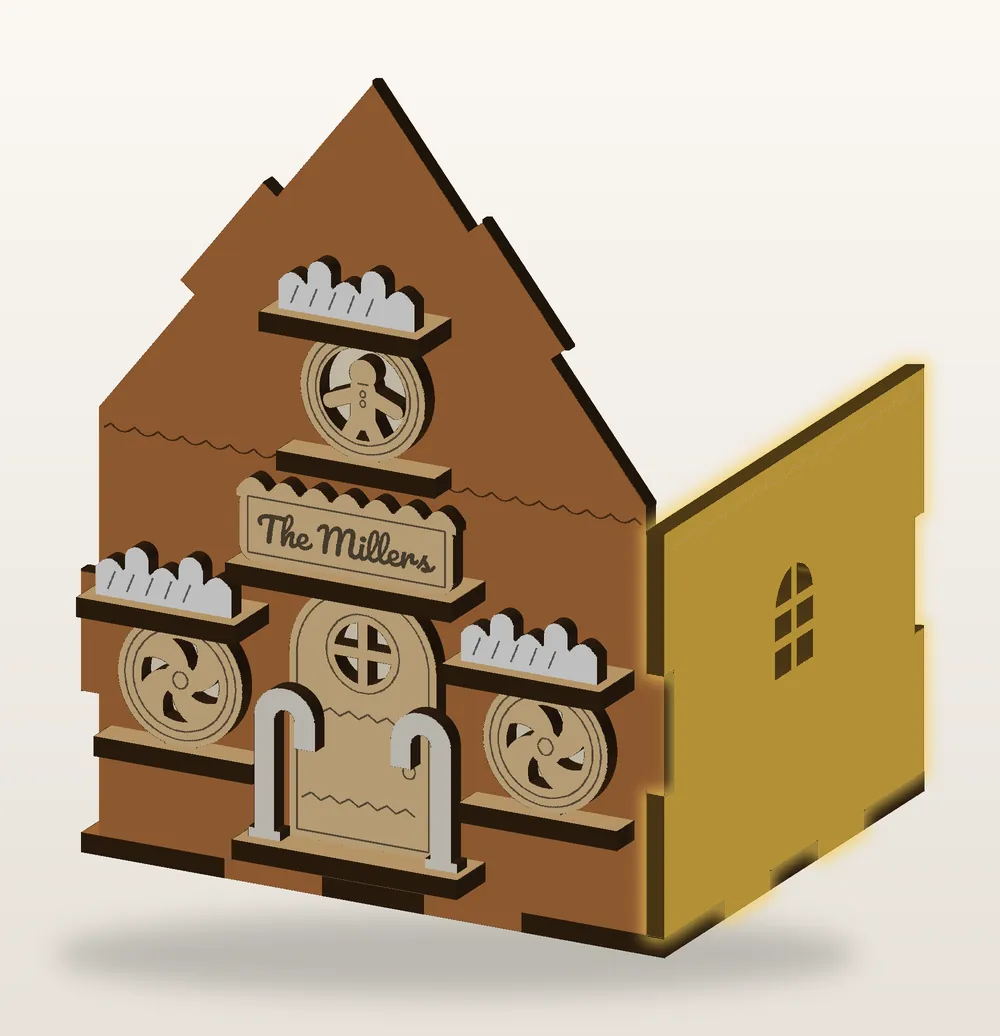
The right side wall slides in from its side and meets the front wall at the corner. The corner tabs mesh like fingers: work them together a little at a time.
Pieces for this stepRIGHT SIDE WALL Step 5: Back wall
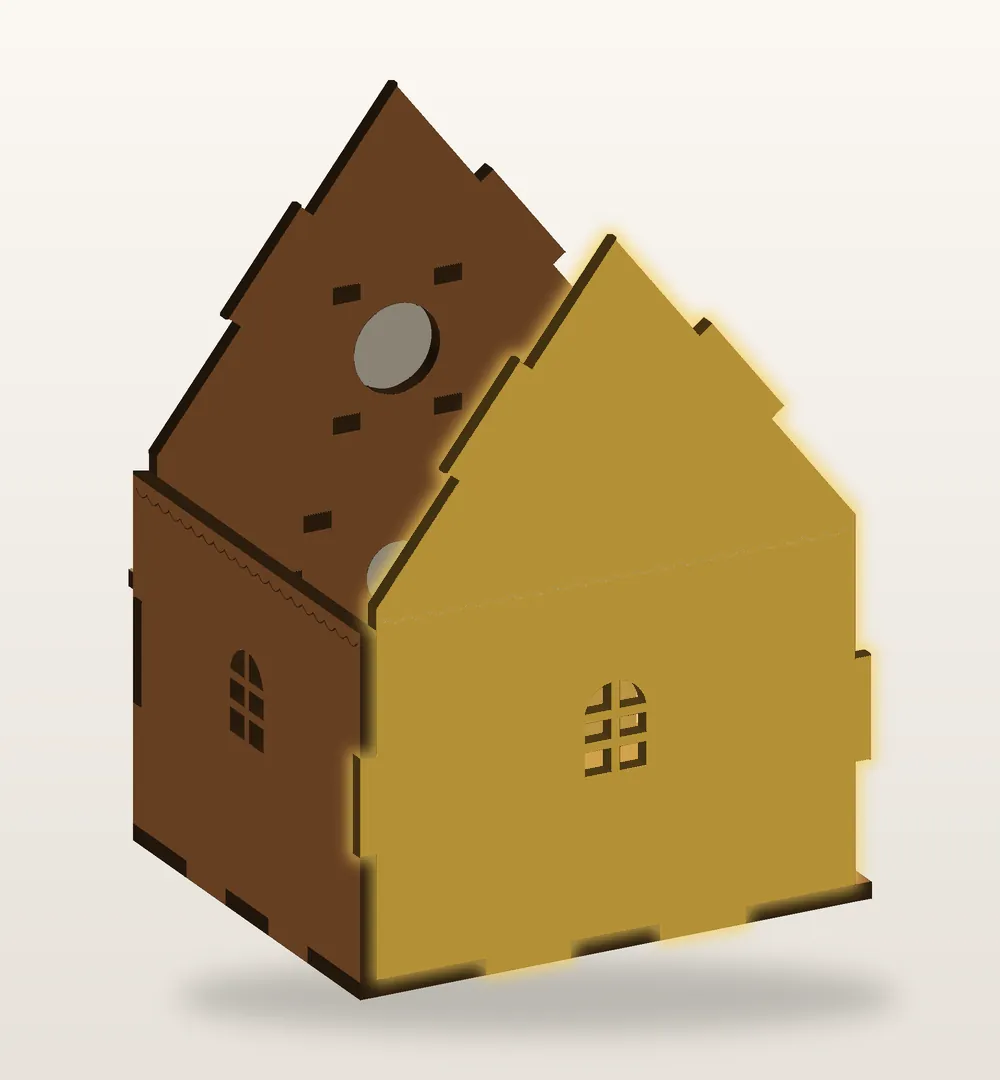
The back wall slides in from the back and locks into the right side wall the same way.
Pieces for this stepBACK WALL Step 6: Left side wall
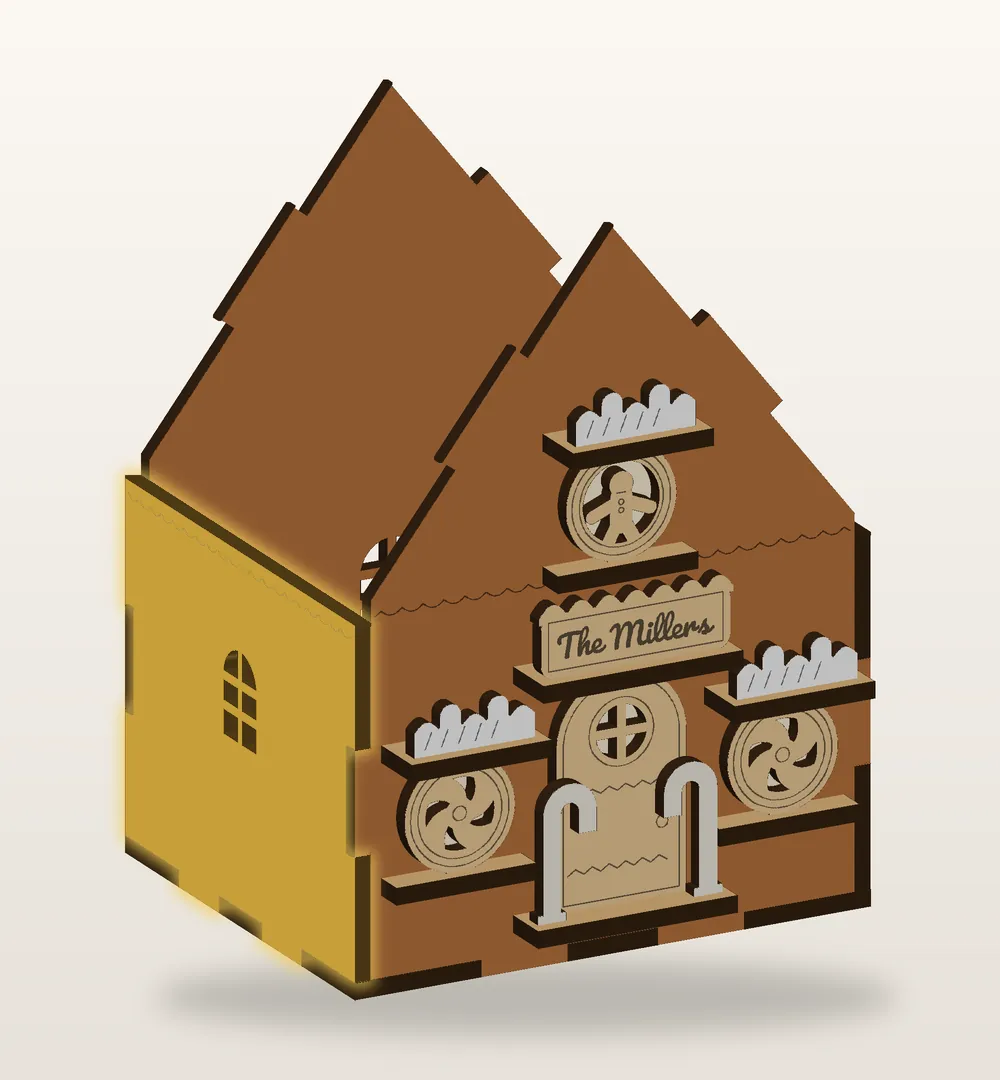
The left side wall slides in from its side and finishes the box. It meets two walls at once: seat one corner, then the other.
Pieces for this stepLEFT SIDE WALL Step 7: Roof, left side first
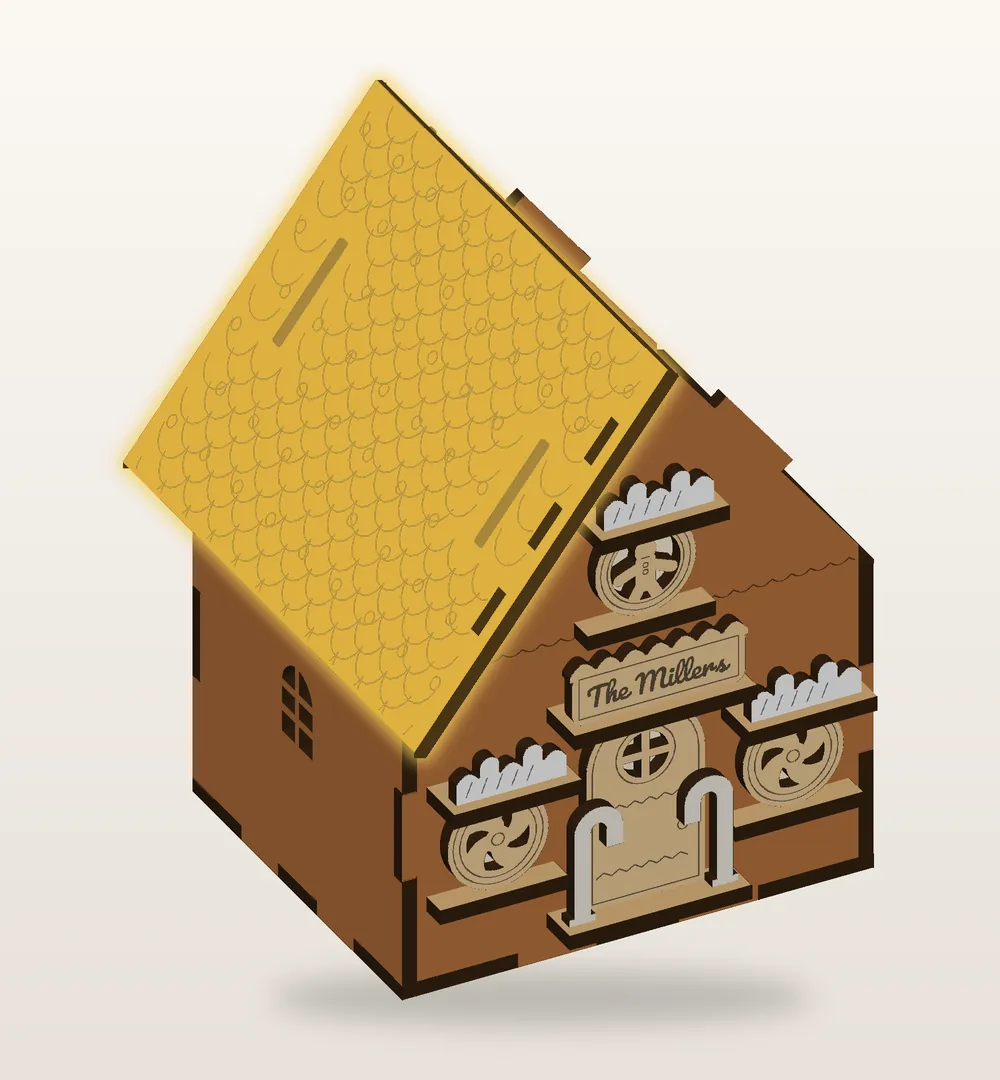
The left roof panel goes on first (the one without the chimney slots). Its slots drop over the tabs along the tops of the front and back walls.
Pieces for this stepLEFT ROOF PANEL Step 8: Roof, right side
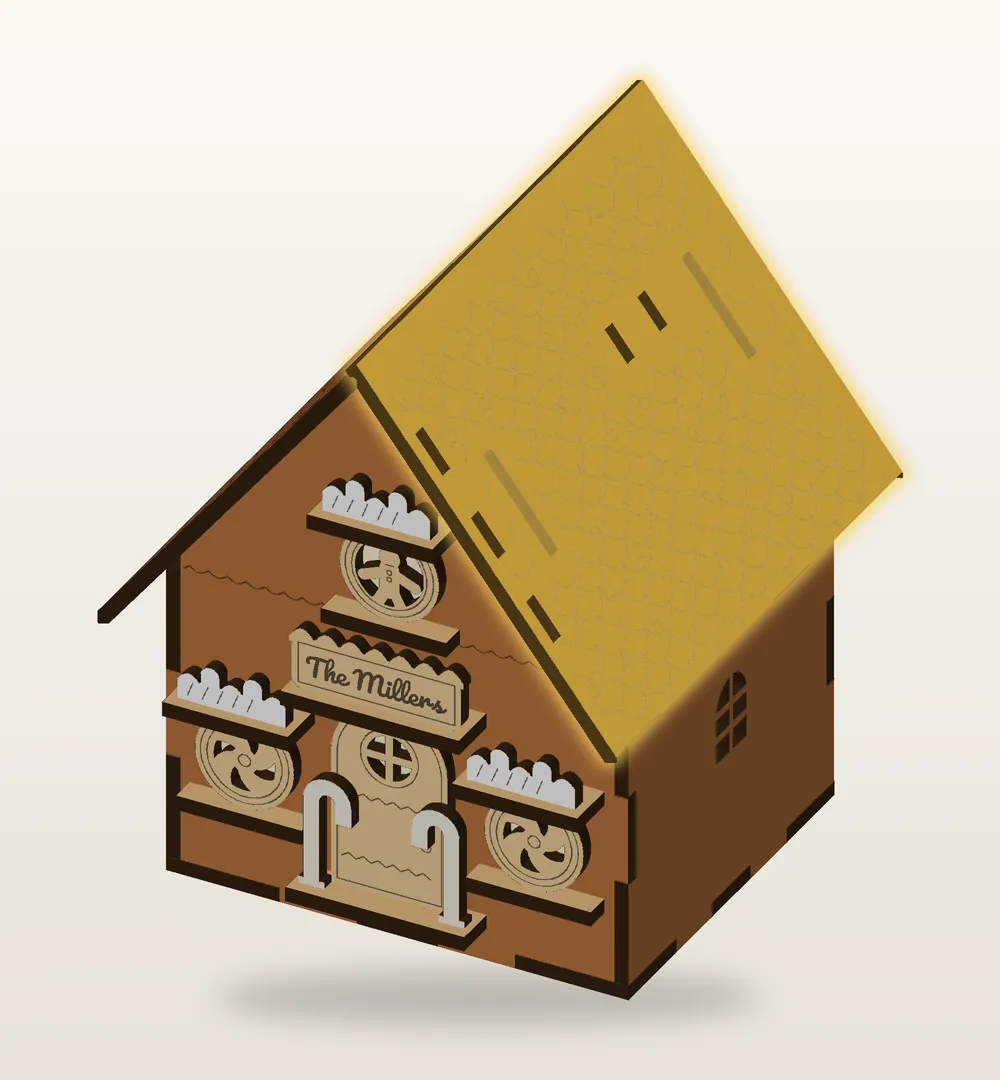
Then the right panel. Its top edge runs on past the ridge and laps over the top of the left panel, so the ridge closes tight with no gap for the light.
Pieces for this stepRIGHT ROOF PANEL Step 9: Chimney
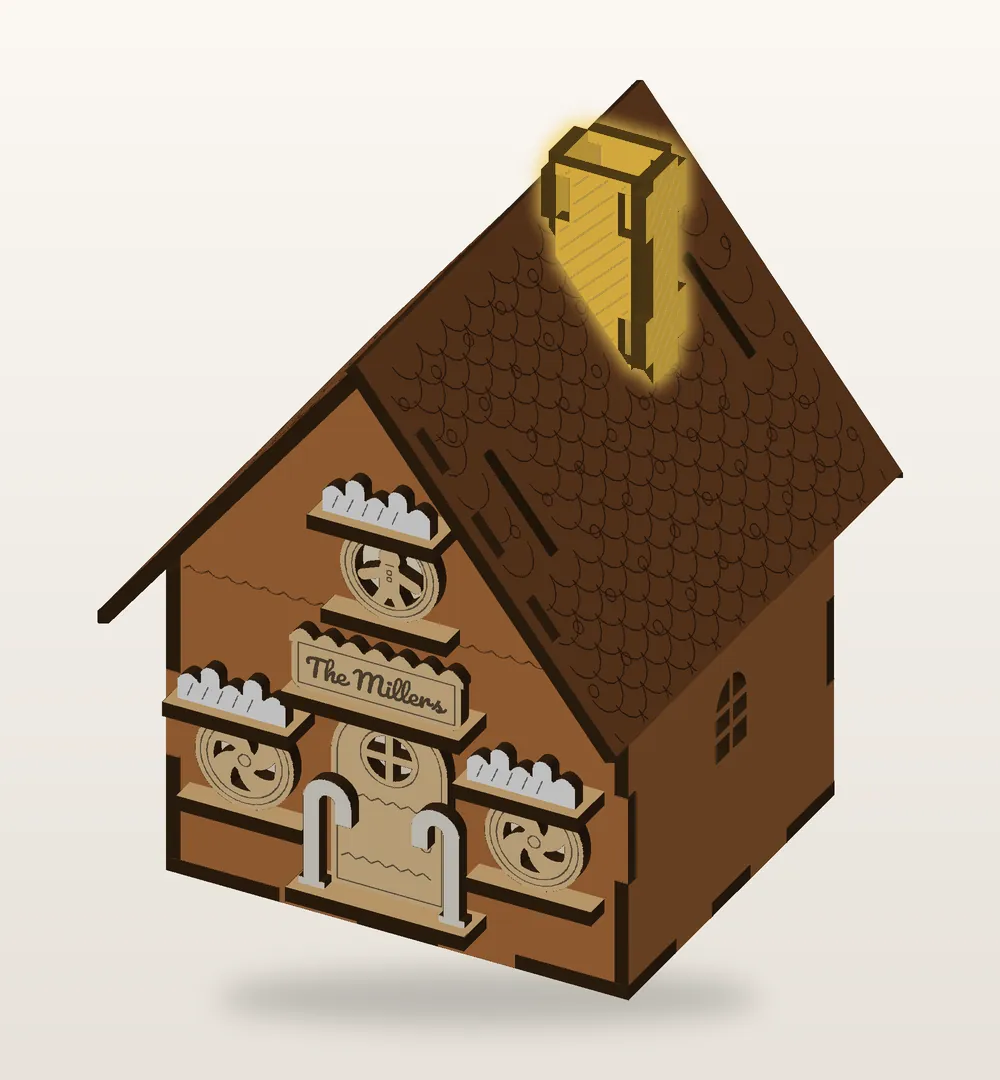
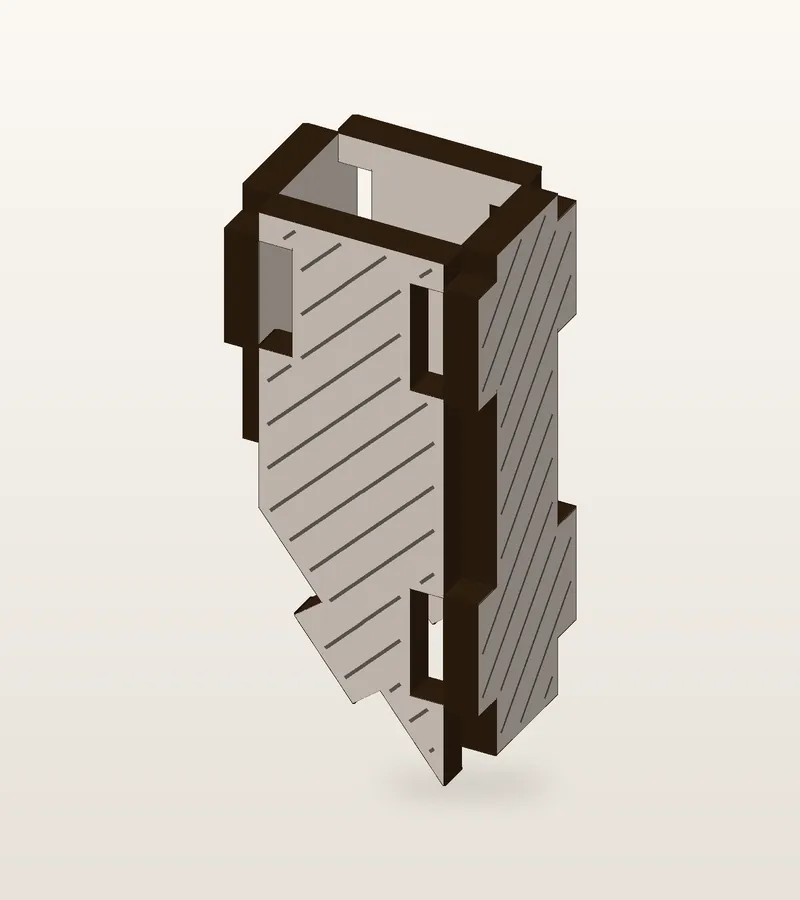
Build the chimney off the house first. Start with the tall wall, then slide the two angled side walls in from the sides, striped faces out, sloped edges toward the bottom. Slide the short wall in to close the box. Then set the chimney on the roof: its tabs go into the roof slots and the sloped edges sit flat on the roof.
Pieces for this stepCHIMNEY SIDE CHIMNEY SIDE CHIMNEY, TALL WALL CHIMNEY, SHORT WALL Step 10: Frosting trim
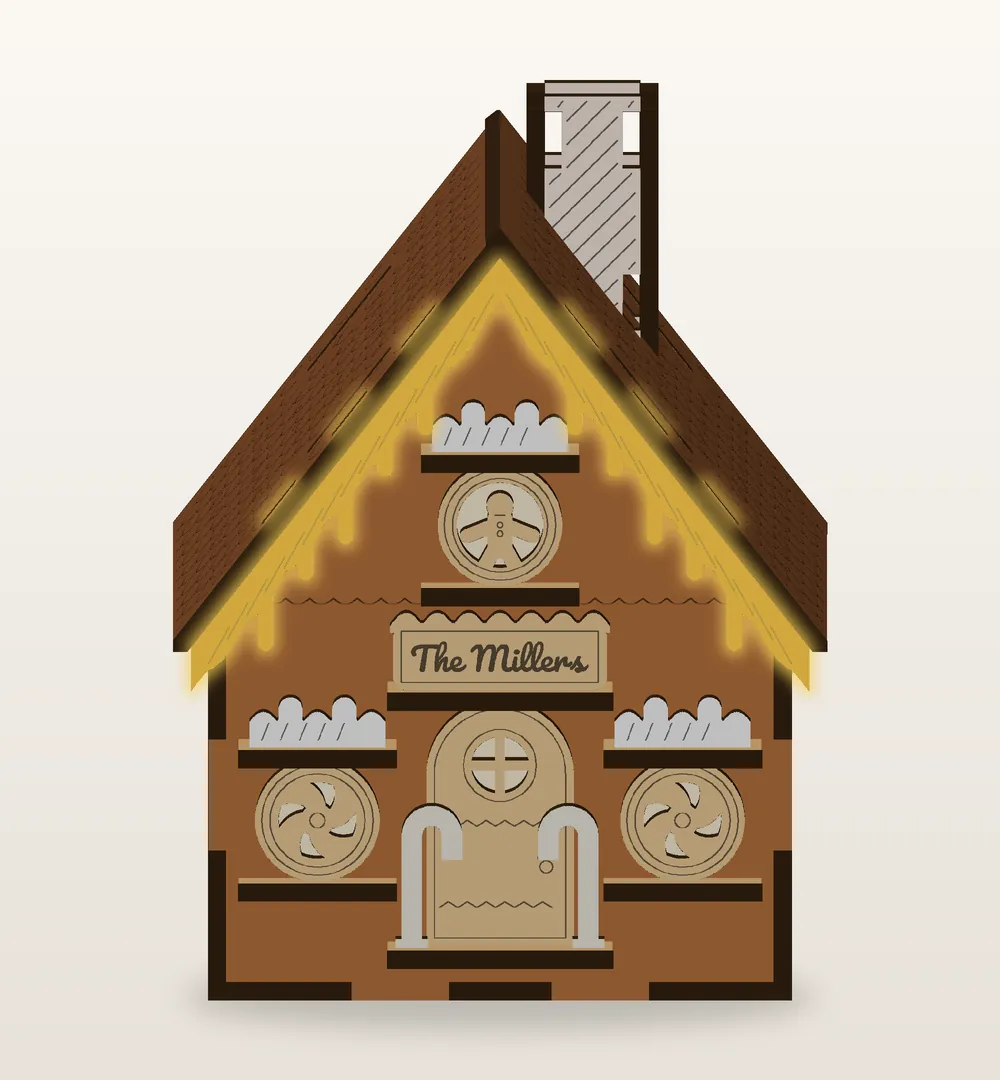

Push each frosting trim half's tabs up into the row of slots near the front edge of the roof. The two halves meet at the peak.
Pieces for this stepFROSTING TRIM, A MIRRORED PAIR Step 11: Light it up
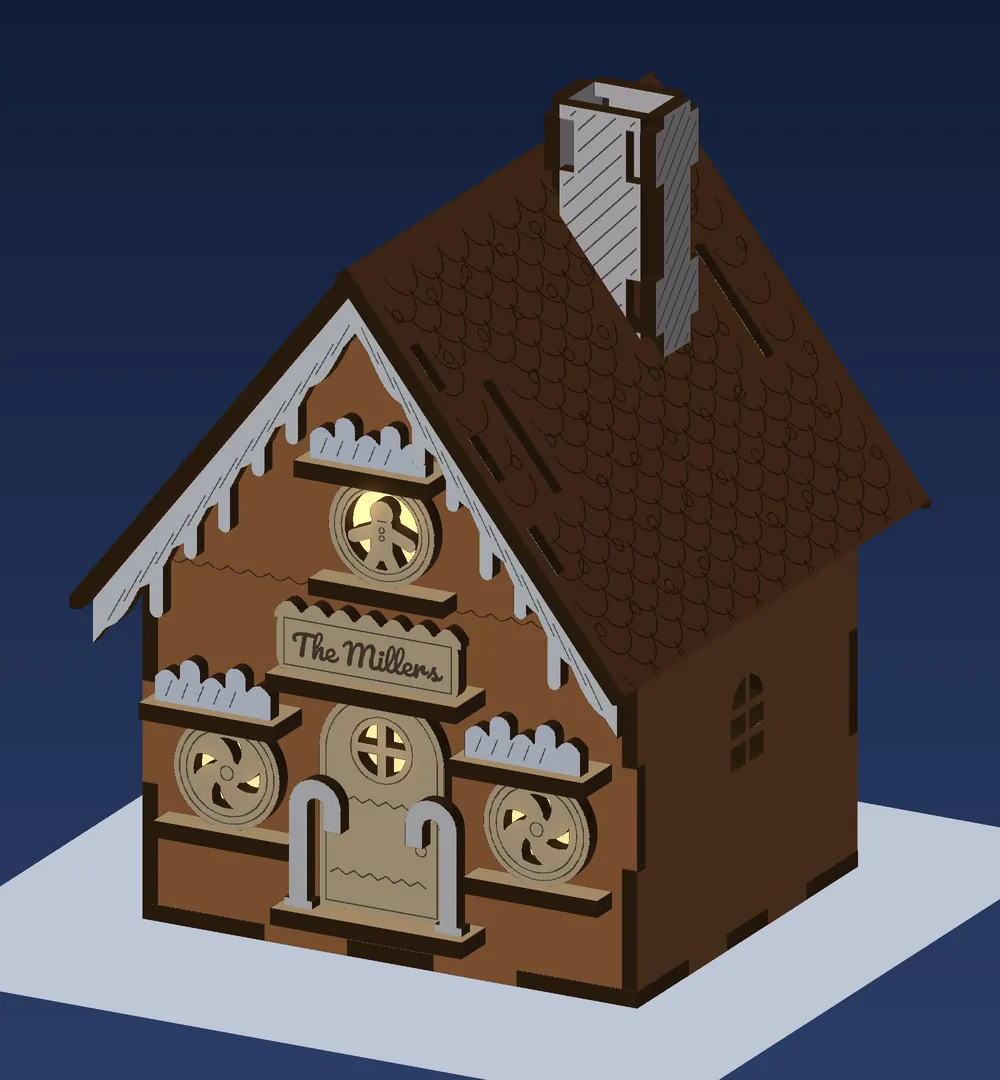
Switch on the LED tealight, set it on the table, and set the gingerbread house down over it so the light comes up through the round opening in the floor. Then drape the fairy lights over the roof and switch them on too. Use LED lights only, never a real candle.
Show off your village
Post a photo of it lit up and tag @glazerslaser on Instagram.
Missing a piece or something will not fit? Email support@glazerslaser.com with a photo and we will sort it out.